turn the number one beginner's knitting project into a summer fashion statement
step one: gather materials
you will need:
- 1. knitting needles OR chopsticks!(no need to go out and buy needles if you have extra laying around)
- 2. yarn (see suggestions listed below)
- 3. a big sewing needle
step two: knit a scarf.. that fits around your bust
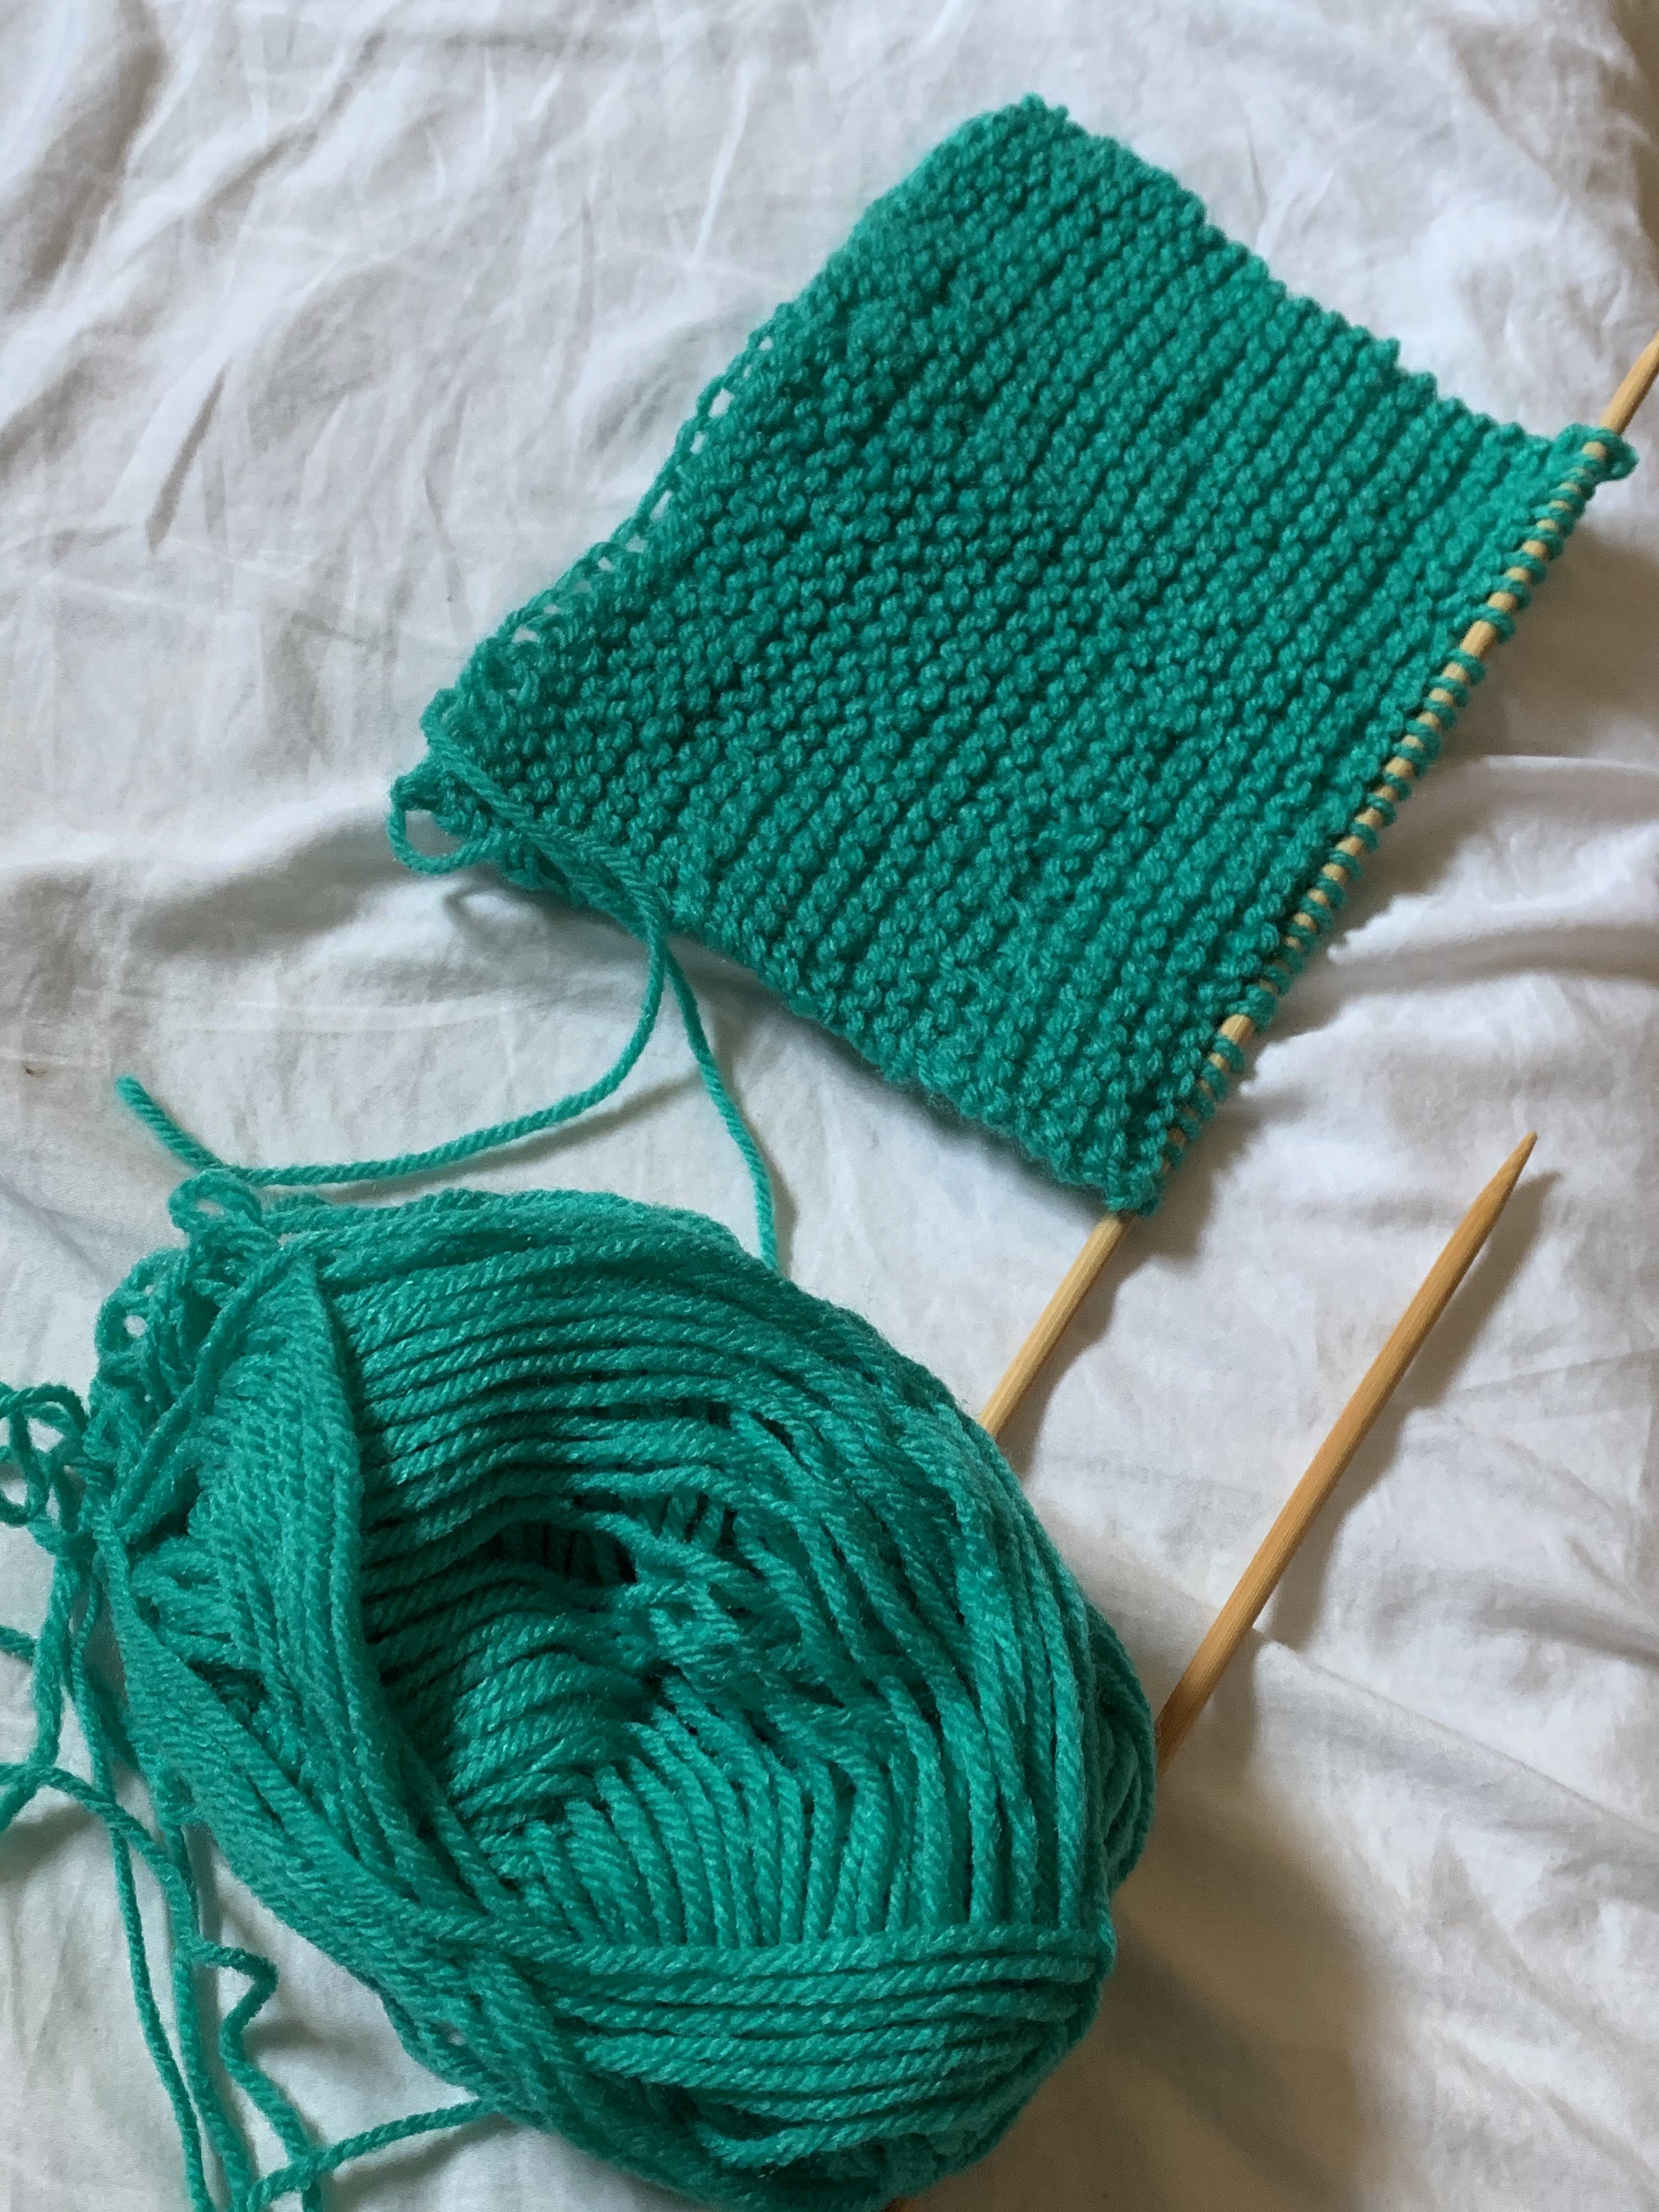
*THIS IS NOT A KNITTING TUTORIAL there are a million and one tutorials out there on how to knit this scarf pattern (see below for our favourites), as it is arguably the easiest for beginners. once you get down the the steps of the stitch it is smooth sailing from there. so go find a tutorial you like for the classic knit stitch, and come back once you've mastered the moves. you are going to have to make the length of the scarf about the same measurement as your bust. for this one the yarn was pretty stretchy so we made it about 4 inches smaller. the easiest way to make this accurate is to wrap it around yourself. the width is also variable, depending how much of your stomach you're trying to show off.. or how high-waisted your pants are.
step three: take your scarf to infinity and beyond
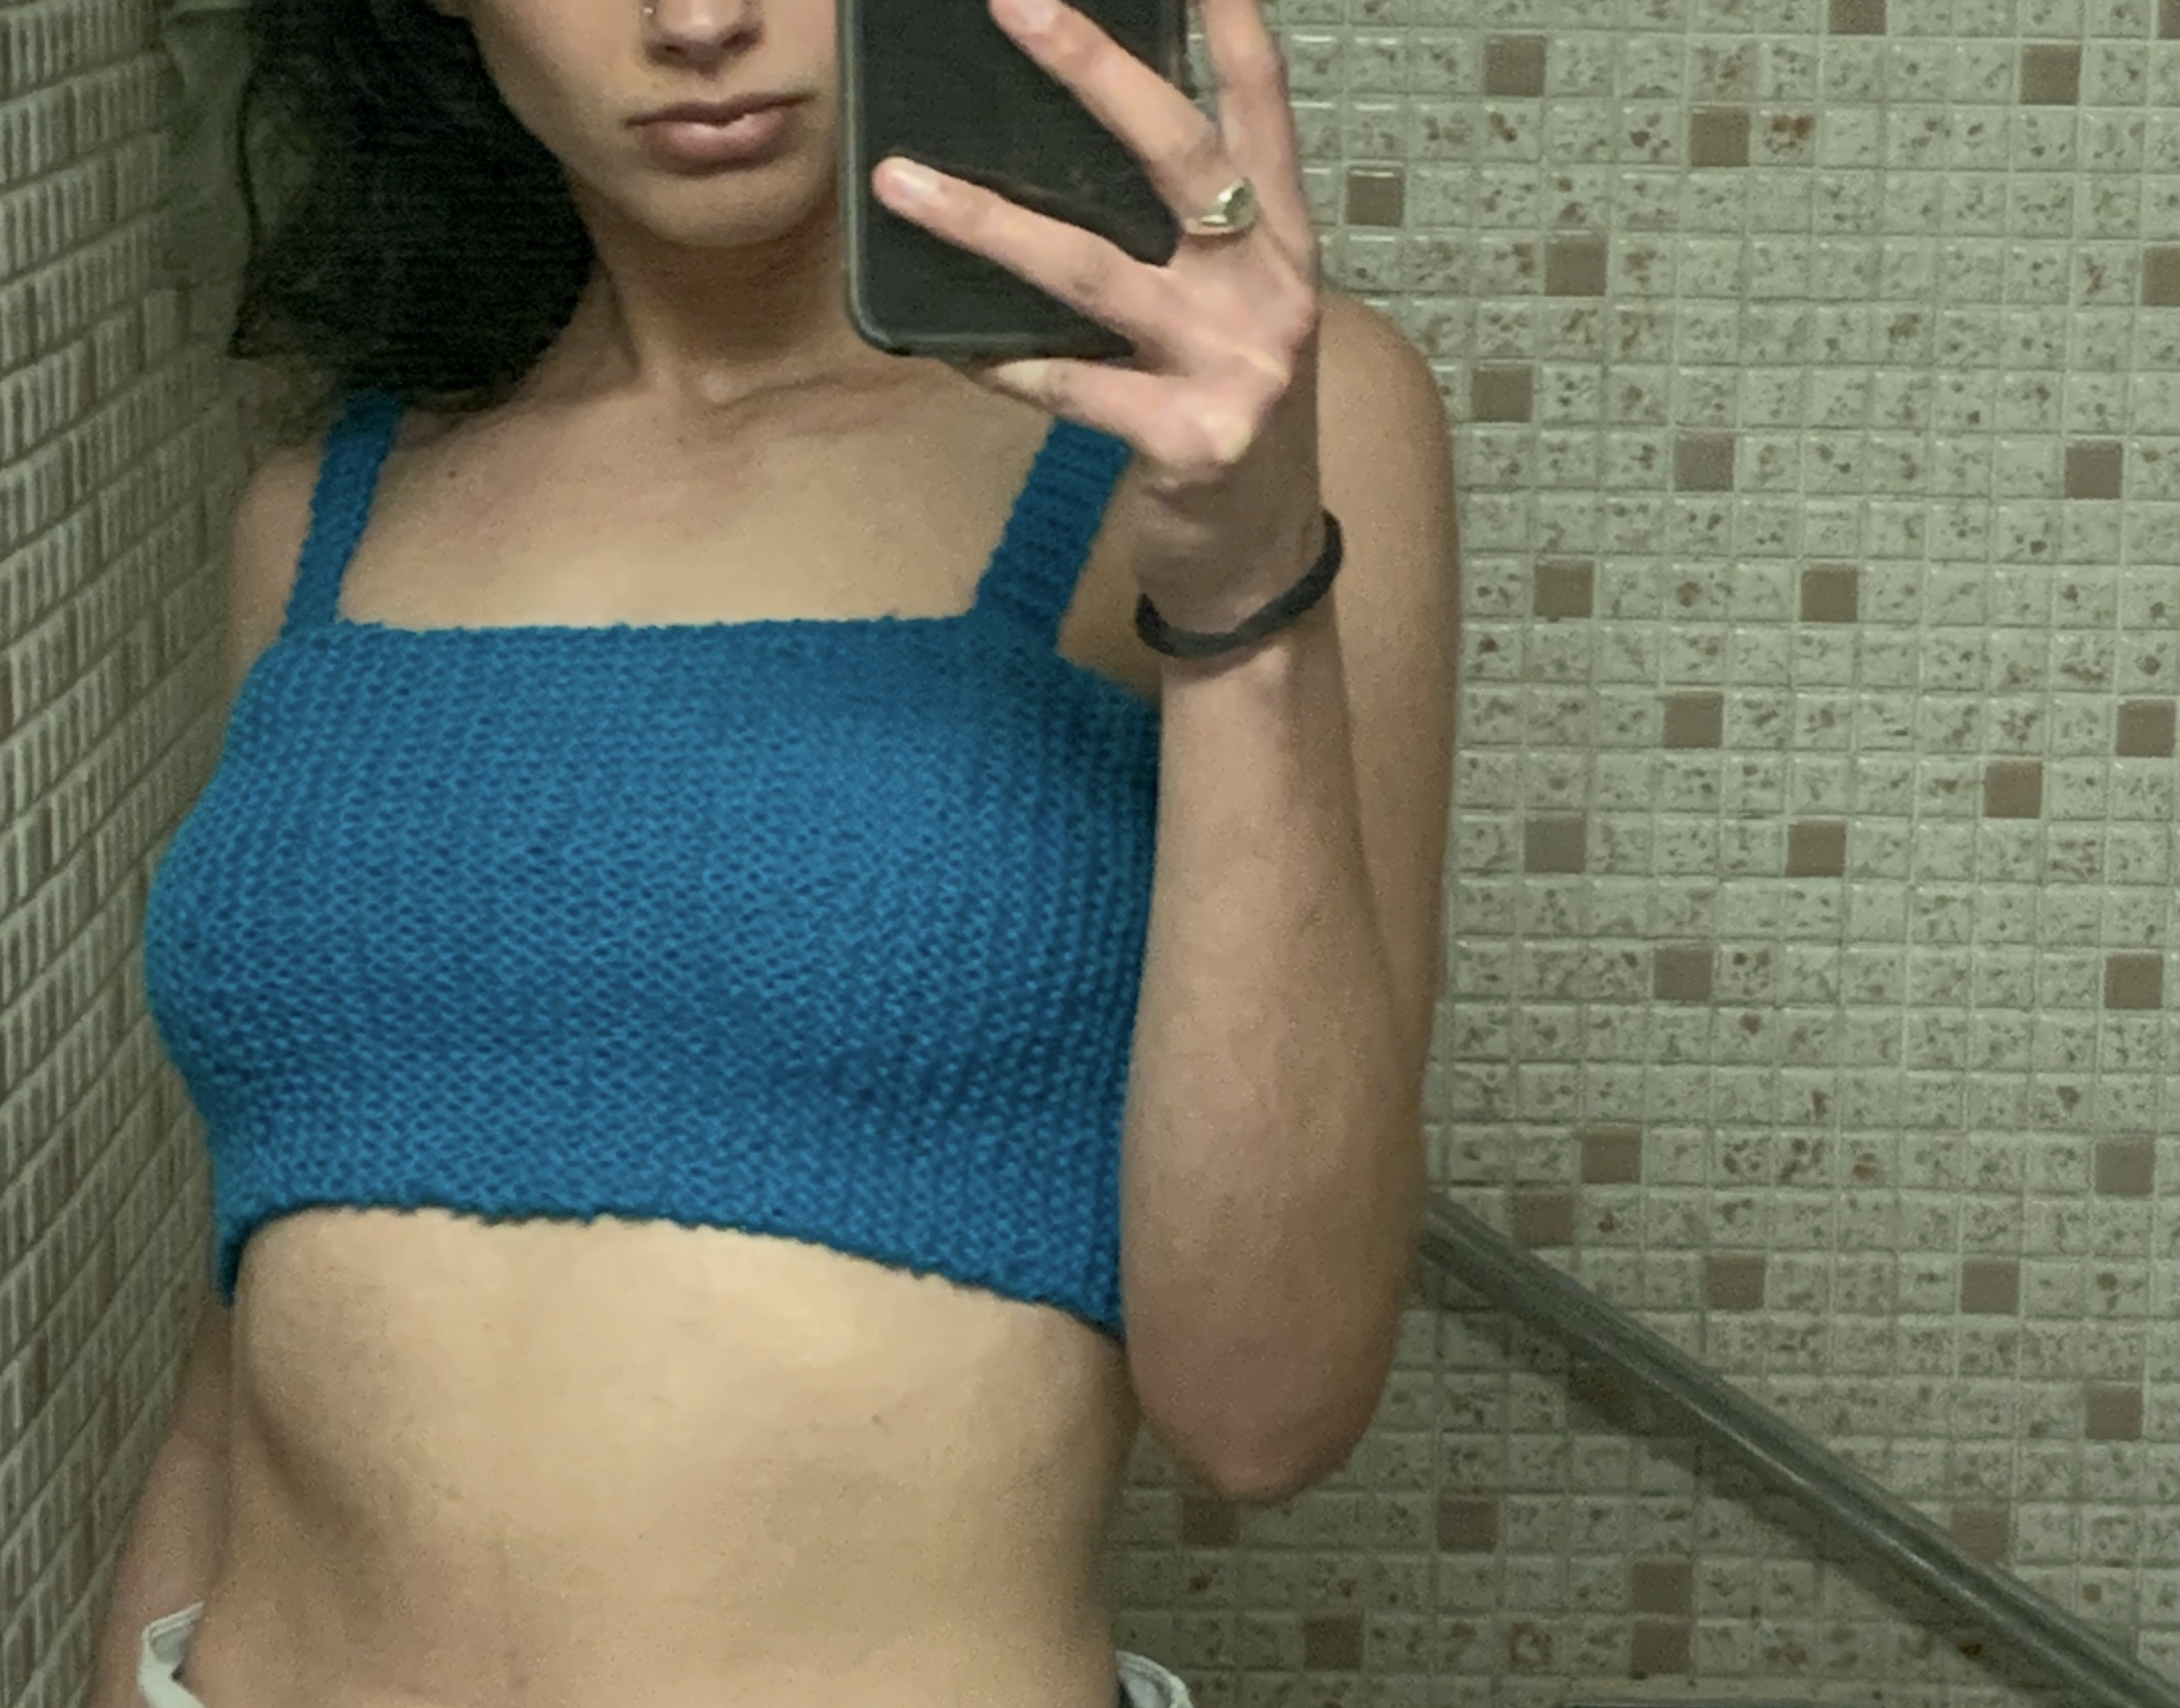
... by this we mean, turn it into an infinity scarf. to do this, you'll need to thread the same yarn you've been using (if you want the seam to blend in), or a different coloured yarn (if you want it to stand out)onto the big needle we said you would need. the best stitch to put the scarf together is the mattress stich: again there one hundred and one great tutorials already, we'll link some below. once you complete this step you should have a loop, cowl, leg warmer... or a tube top. but wait! there's more
step four: make straps (for security, or not if you like to live life on the edge)
using the same stitch you just mastered, you are going to make some straps. the width, again, is variable depending on your preferences. for ours we used 6 stitches, but you could use less for spaghetti style straps, or more for thicker ones, the choice is all yours. the easiest way we found to figure out the ideal length is to measure the straps of another top you already own, you could also make them a bit longer and use them for a halter top. once you have one, repeat the process, unless you're feeling edgy and only want a single strap.
step five: add the straps (or don't)
there really is no perfect formula for this, the first iteration of this was basically an experiement so who's to say you can't make alterations. for our version, at this stage we added the straps by using a simple hand stitch with our trusty big needle. make sure if you are doing this that the side of your creation you like best is opposite the side you are attaching your straps to. also try to make sure your straps are evenly placed. it is also a good idea to start with the straps attached to one side of your shirt and then put it on to know exactly where to sew your straps on the other side (we didn't do this for our first iteration and had to re-sew it because the straps were too long).
and now you have a top!
resources
yarn!
avoid the following*:
- acrylic
- polyester
- nylon
- synthetic dyes
*unless you find it sitting in your grandma's basement and it'll get thrown out otherwise
instead look for:
- wool
- silk
- cotton
- synthetic dyes
here are some brands to look into: